Acoustic Booth for Recording: Solution for Professional Sound Isolation
Why a Large Acoustic Booth is Essential for Drum Recording
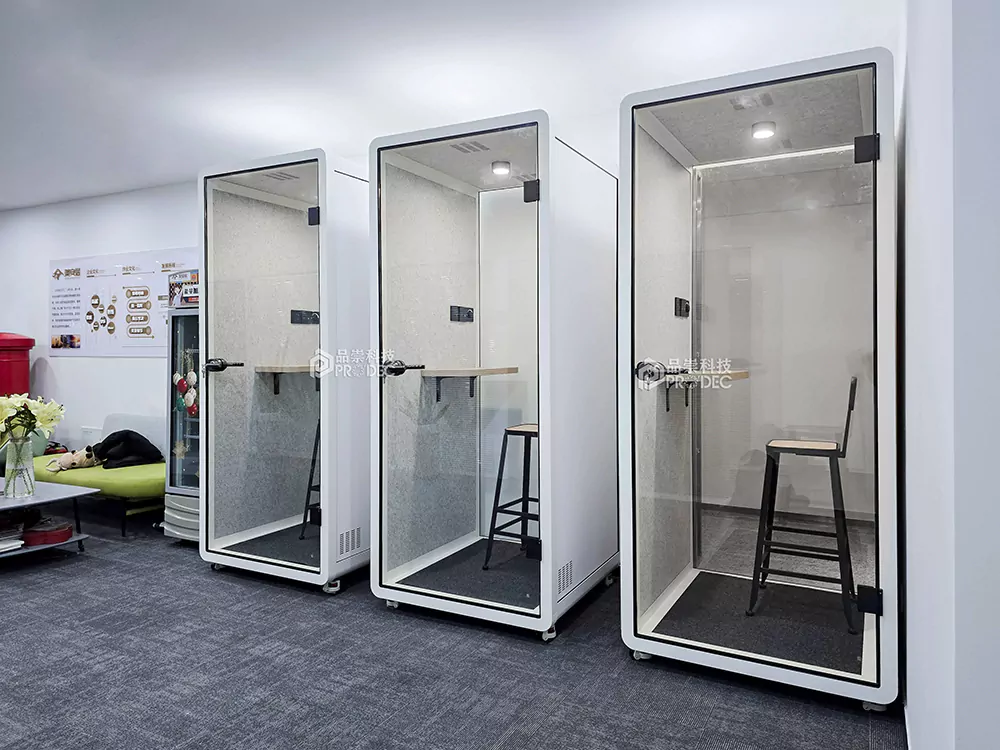
When it comes to capturing the full dynamic range and tonal complexity of a drum kit, standard vocal booths or small isolation spaces fall short. A Large Acoustic Booth for Drum Recording is specifically engineered to accommodate the spatial footprint of a complete drum set while providing optimal acoustic control. Unlike smaller booths that compress sound and create unnatural reflections, large acoustic booths are designed with precise volume-to-instrument ratios, ensuring that the natural decay and resonance of each drum and cymbal are preserved. This is critical for professional and semi-professional studios aiming to produce broadcast-quality recordings for music, film, or broadcast media.
The primary function of such a booth is sound isolation—preventing leakage into adjacent rooms or microphones—and internal acoustic treatment to eliminate standing waves, flutter echoes, and frequency build-up. These booths often utilize modular construction with high-mass walls, decoupled structures, and multi-layered absorption-diffusion systems. For drummers and audio engineers, this translates into cleaner tracks, reduced post-production editing, and greater creative flexibility during mixing. Whether used in a home studio, project space, or commercial facility, a well-designed large acoustic booth significantly elevates the quality and efficiency of drum recording sessions.
Step-by-Step Guide to Designing Your Large Acoustic Booth
Step 1: Define Room Dimensions and Instrument Layout
Begin by measuring the typical drum kit configuration you plan to record. Allow at least 18–24 inches of clearance around the entire kit for mic placement and player movement. A minimum internal dimension of 8’ x 10’ is recommended for a standard five-piece kit, with ceiling height no less than 7.5 feet to avoid early reflections from overhead cymbals.
Step 2: Choose an Optimal Location
Select a structurally isolated area away from HVAC systems, elevators, or external noise sources. Ideally, place the booth on a ground-level floor or over a floating slab to minimize vibration transmission.
Step 3: Design for Sound Isolation
Implement double-wall construction with air gaps, using materials like mass-loaded vinyl (MLV), resilient channels, and staggered stud framing. Aim for a Transmission Loss (TL) of at least 55 dB across 100 Hz – 4 kHz.
Step 4: Install a Decoupled Floor System
Use a floating floor with neoprene isolators or rubber pads beneath a plywood subfloor. This prevents structure-borne noise from reaching the building’s foundation.
Step 5: Select Acoustic Treatment Materials
Incorporate broadband bass traps in all corners, mid-frequency absorption panels on side walls, and diffusive elements on the rear wall to maintain a balanced frequency response without over-damping.
Step 6: Address Ceiling Acoustics
Suspend cloud absorbers or install a dropped ceiling with mineral wool insulation. Angled ceilings can help deflect early reflections away from microphones.
Step 7: Integrate Ventilation with Acoustic Ducting
Install a quiet HVAC system with lined ducts and baffles to maintain NR-20 noise criteria inside the booth without compromising air quality.
Step 8: Install Acoustically Rated Doors and Windows
Use double-sealed, solid-core doors with automatic drop seals. Observation windows should be dual-pane laminated glass with argon fill, achieving STC > 50.
Step 9: Wire for Audio and Power
Run shielded cables through isolated conduits. Include multiple XLR, TRS, and power outlets inside the booth, all grounded to prevent hum.
Step 10: Perform Acoustic Testing and Calibration
After construction, conduct impulse response measurements using a calibrated microphone and analyzer. Adjust panel placement and tuning based on RT60 and frequency response data.
Performance Comparison: Standard Booth vs. Large Acoustic Booth for Drum Recording
| Fonctionnalité | Standard Vocal Booth | Large Acoustic Booth for Drum Recording |
|---|---|---|
| Internal Dimensions | 4′ x 4′ x 6.5′ | 8′ x 10′ x 7.5’+ |
| Primary Use | Vocals, acoustic guitar | Full drum kits, percussion ensembles |
| Temps de réverbération (RT60) | 0.3 – 0.5 s | 0.6 – 0.9 s (tunable) |
| Sound Isolation (STC) | 35 – 40 | 50 – 60 |
| Bass Trap Coverage | Minime | Full corner line arrays |
Technical Specifications and Material Selection
Selecting the right materials is paramount in constructing a high-performance Large Acoustic Booth for Drum Recording. Walls should consist of two layers of 5/8” Type X gypsum board separated by a 2” air gap filled with rockwool insulation (density: 80 kg/m³). The frame must use resilient channels or hat channels to decouple drywall from studs, minimizing mechanical coupling.
For low-frequency absorption, triangular bass traps made from rigid fiberglass (4” thick, NRC ≥ 0.95) should be installed from floor to ceiling in all vertical corners. Mid-range absorption can be achieved with 2” thick fabric-wrapped panels placed at first reflection points. Diffusers—such as quadratic residue diffusers (QRD)—should be mounted on the rear wall to scatter sound energy evenly without deadening the space.
Flooring typically combines a floating subfloor (two layers of ¾” plywood on rubber isolators) topped with a durable vinyl or carpet finish. Ceilings benefit from suspended cloud baffles hung at variable heights to break up parallel surfaces. All seams, joints, and penetrations must be sealed with acoustical caulk to prevent flanking noise.
Expérience des utilisateurs et retour d'information sur le monde réel
“We installed a custom Large Acoustic Booth for Drum Recording in our post-production studio, and the difference was immediate. No more bleed into dialogue mics, and the drum transients are captured with stunning clarity. It paid for itself in saved editing time.” — Mark T., Senior Sound Engineer, Los Angeles
“As a semi-pro drummer, I wanted a space where I could track full kits without disturbing neighbors. The booth’s design allowed rich low-end response without boominess. Highly recommend for serious home recordists.” — Elena R., Music Producer, Austin, TX
Advanced Features in Modern Large Acoustic Booths
Today’s premium booths integrate smart monitoring systems, remote-controlled lighting, and IoT-enabled environmental sensors. Some models include motorized acoustic panels that adjust absorption levels dynamically based on session type—ideal for studios handling both voice-over and live instrument recording.
Another innovation is the hybrid reflection-absorption wall system, which uses adjustable slat diffusers backed by variable-depth cavities. This allows users to fine-tune the room’s liveliness depending on drum genre—jazz may require longer decay, while rock benefits from tighter control.
Additionally, RF and EMI shielding can be incorporated for facilities conducting sensitive recordings or located near strong electromagnetic fields. This ensures clean signal paths and eliminates unwanted interference in high-gain mic preamps.
Cost-Benefit Analysis: Investment vs. Long-Term Value
| Aspect | DIY Construction | Professional Installation |
|---|---|---|
| Average Cost (USD) | $4,000 – $7,000 | $12,000 – $25,000+ |
| Sound Isolation Performance | Moderate (STC ~45) | High (STC 55+) |
| Acoustic Accuracy | Variable, depends on expertise | Precisely calibrated |
| Labor Time | 60–100 hours | Handled by professionals |
| Warranty & Support | Limited or none | Full service package included |
While DIY options offer cost savings, professional installations ensure compliance with industry standards such as GY/T5086 and ISO 3382. They also provide guaranteed performance metrics, technical support, and long-term durability—critical for commercial operations.
Conclusion: Elevating Your Recording Capabilities
A Large Acoustic Booth for Drum Recording is not merely a luxury—it’s a strategic investment in sonic excellence. By combining architectural precision, advanced materials, and scientific acoustic principles, these booths empower engineers and musicians to capture performances with unmatched fidelity. Whether you’re building a new studio or upgrading an existing one, prioritizing proper isolation and treatment will yield dividends in audio quality, workflow efficiency, and client satisfaction.
本文由人工智能技术生成,基于公开技术资料和厂商官方信息整合撰写,以确保信息的时效性与客观性。我们建议您将所有信息作为决策参考,并最终以各云厂商官方页面的最新公告为准。